Getting Started
See the whole platform work end to end before you touch any hardware. In about ten minutes you'll have a simulated device reporting real telemetry to your dashboard.
Just want to see it working? Live demo →The whole flow in under a minute
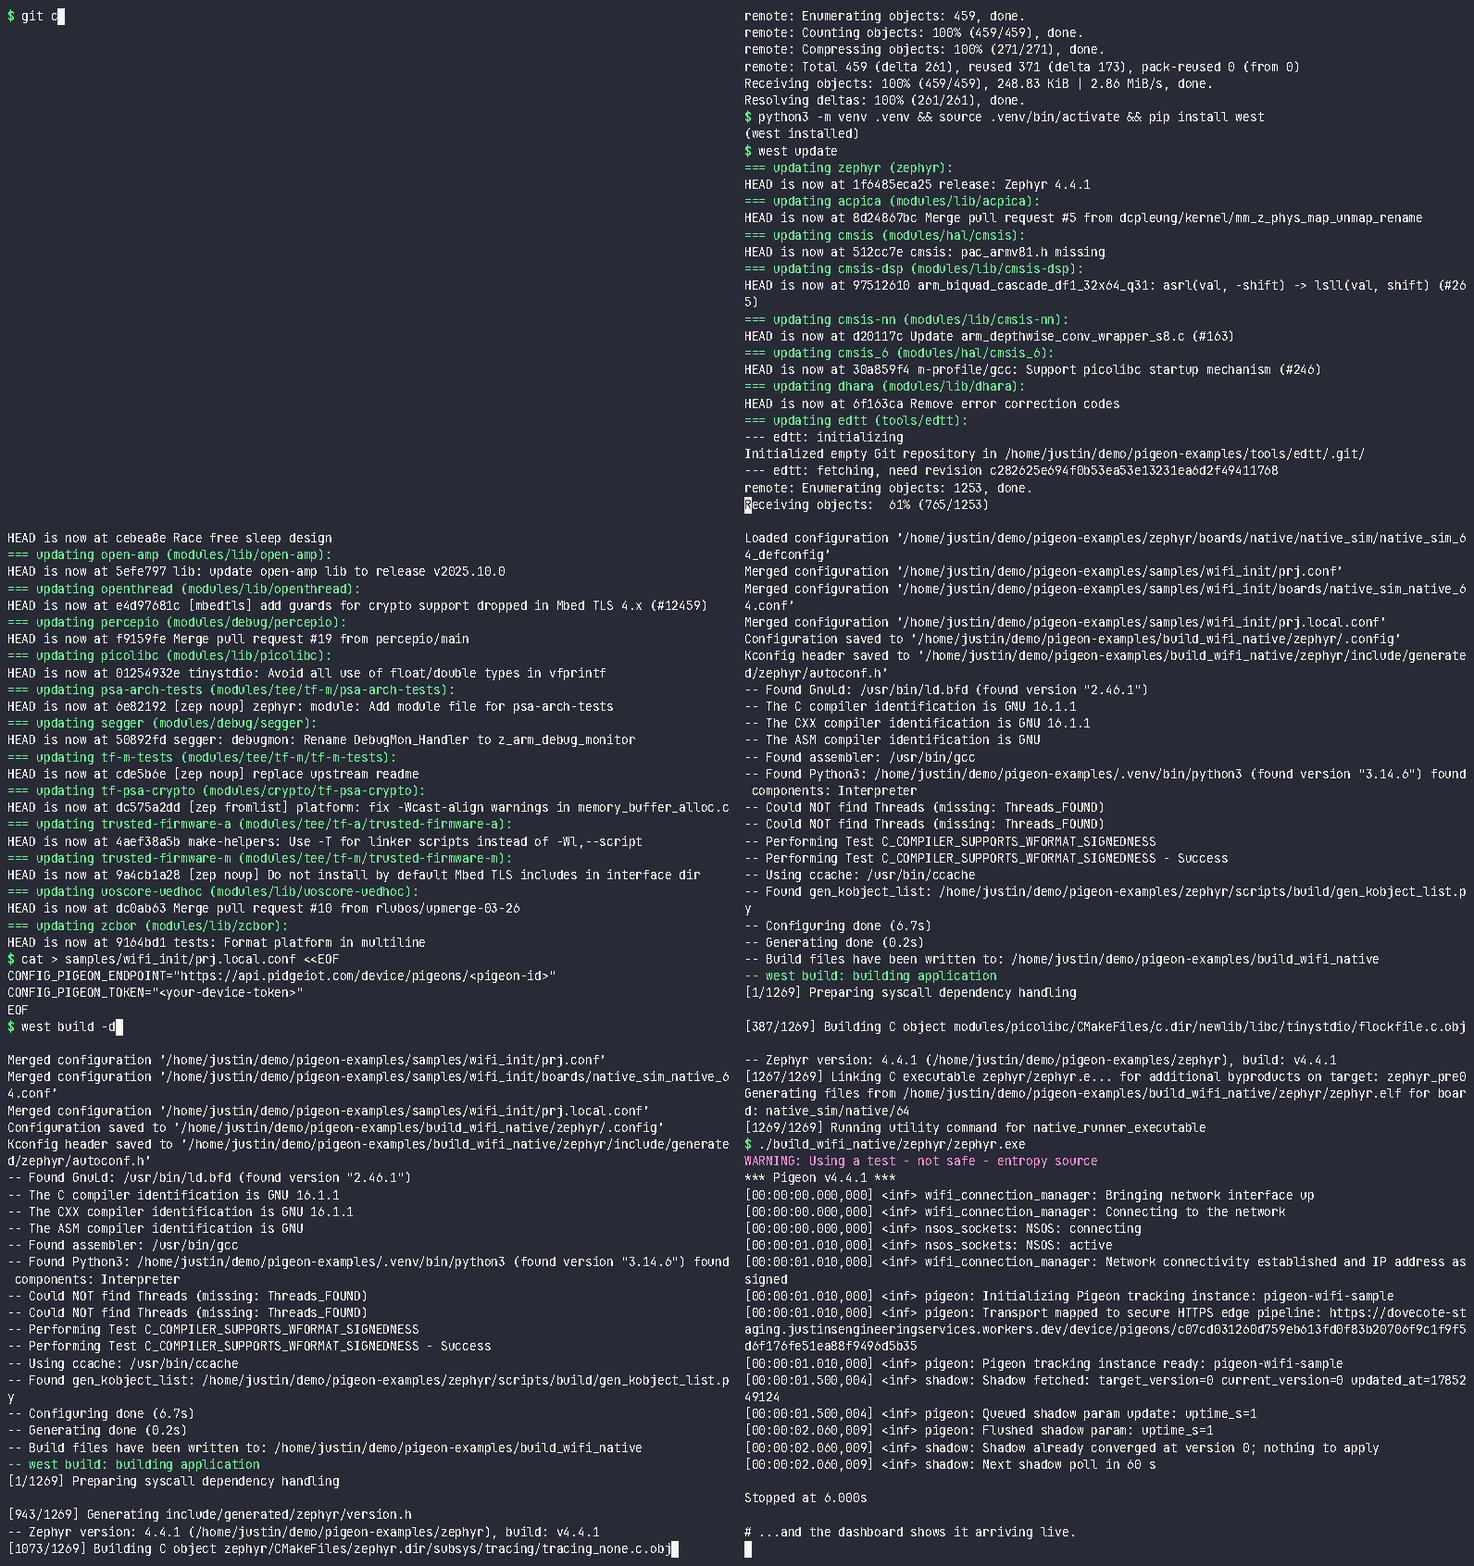
What you'll have at the end
A simulated pigeon -- Zephyr's native_sim target, running as a plain binary on your own machine, no board or radio involved -- connected to your dashboard, fetching its shadow and reporting telemetry just like a real device would. It's the fastest way to try the whole platform before flashing anything real.
Set up in the dashboard
Create your account
Register a dashboard account and verify your email. Once it's confirmed you land signed in.
Create a flock
On the Flocks page, click "Create Flock" and give it a name. A flock just groups pigeons under one owner.
Register a pigeon
Open the flock and click "Register Pigeon." Give it a name (e.g. "Simulated Pigeon"), leave Serial and Board blank, and leave Protocol on its default, HTTPS (REST API) -- then click "Register Device."
Save the one-time device token
A Device Token dialog appears immediately -- this is the only time the token is ever shown, and it can't be retrieved later (refreshing it mints a new keypair and revokes this one). Copy it with the clipboard button, then click "I've Saved the Token."
Copy the device endpoint
Dismissing the token dialog takes you to the pigeon's own detail page. Under "Connector," the Endpoint field (with its own copy button) is the URL you'll bake into the simulator -- it looks like https://api.pidgeiot.com/device/pigeons/<pigeon-id>.
Run the simulator on your machine
This runs wifi_init, a sample from the pigeon-examples repository, built for Zephyr's native_sim board target. You don't need WiFi credentials or a board -- native_sim swaps in host-socket networking, and compiles as a plain native binary, so a working host C compiler is the only real prerequisite (no Zephyr SDK cross-toolchain needed for this target). See the pigeon-examples README for the full west workspace walkthrough this reuses.
1. Clone the repo and set up the west workspace
git clone https://github.com/justins-engineering/pigeon-examples
cd pigeon-examples
python3 -m venv .venv && source .venv/bin/activate
pip install west
west update
"west update" fetches the Zephyr sources -- a few hundred MB, one time only.
2. Add your device credentials
Paste in the endpoint and token from steps 4-5 above:
cat > samples/wifi_init/prj.local.conf <<'EOF'
CONFIG_PIGEON_ENDPOINT="https://api.pidgeiot.com/device/pigeons/<pigeon-id>"
CONFIG_PIGEON_TOKEN="<device-bearer-token>"
EOF
This file is git-ignored -- these are real device secrets, never commit them.
3. Build and run
west build -d build_wifi_native samples/wifi_init -b native_sim/native/64
./build_wifi_native/zephyr/zephyr.exe
What you should see
Within about a second, the console prints something like:
WARNING: Using a test - not safe - entropy source
*** Pigeon v4.4.1 ***
[00:00:00.000,000] <inf> wifi_connection_manager: Bringing network interface up
[00:00:00.000,000] <inf> wifi_connection_manager: Connecting to the network
[00:00:01.010,000] <inf> wifi_connection_manager: Network connectivity established and IP address assigned
[00:00:01.010,000] <inf> pigeon: Transport mapped to secure HTTPS edge pipeline: https://api.pidgeiot.com/device/pigeons/<pigeon-id>
[00:00:01.510,004] <inf> shadow: Shadow fetched: target_version=0 current_version=0
[00:00:01.870,008] <inf> pigeon: Flushed shadow param: uptime_s=1
[00:00:01.870,008] <inf> shadow: Next shadow poll in 60 s
The entropy warning is expected: native_sim has no hardware random source, so Zephyr simulates one and says so loudly. Real boards use their own TRNG.
That last line is the simulator reporting its own uptime as a telemetry value. Leave it running -- it keeps flushing on an interval.
Back in the dashboard, on the pigeon's detail page:
- The connection badge next to the pigeon's name flips to online once it's reported in.
- Try the config loop: click Edit Shadow and set
{"telemetry_interval": 30}. Within one poll the simulator's console reads "Next shadow poll in 30 s", the reports speed up, and the Shadow section's Current version catches up to Target -- the full config round trip. (A device only adopts keys its firmware understands -- this sample knowslog,telemetry_interval, andreboot. Anything else stays visible in Target but won't appear in Current, which is exactly how you spot a key your firmware ignored.) - Every numeric value the device reports becomes graphable under Telemetry Graphs.
uptime_sis the only key this sample sends -- it plots as a dutiful climbing staircase, which proves the pipeline but wins no awards. Graphs get good when you report real sensor values (see the live demo).